
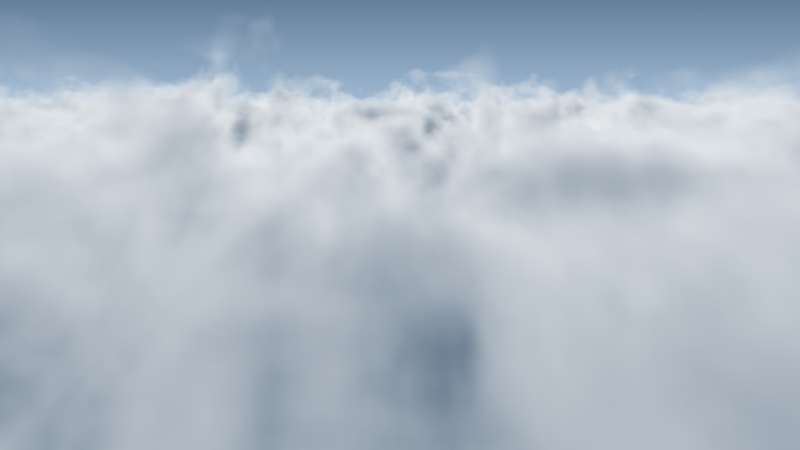
There is an amazing shadertoy called “Tiny Clouds” by stubbe (twitter: @Stubbesaurus) which flies you through nearly photorealistic clouds in only 10 lines of code / 280 characters (2 old sized tweets or 1 new larger sized tweet).
The code is a bit dense, so I wanted to take some time to understand it and share the explanation for anyone else who was interested. Rune (the author) kindly answered a couple questions for me as well. Thanks Rune!
Link: [SH17A] Tiny Clouds (Check out this link, it looks even more amazing in motion)
Here is the code in full. The texture in iChannel0 is just a white noise texture that is bilinearly sampled.
#define T texture(iChannel0,(s*p.zw+ceil(s*p.x))/2e2).y/(s+=s)*4.
void mainImage(out vec4 O,vec2 x){
    vec4 p,d=vec4(.8,0,x/iResolution.y-.8),c=vec4(.6,.7,d);
    O=c-d.w;
    for(float f,s,t=2e2+sin(dot(x,x));--t>0.;p=.05*t*d)
        p.xz+=iTime,
        s=2.,
        f=p.w+1.-T-T-T-T,
    	f<0.?O+=(O-1.-f*c.zyxw)*f*.4:O;
}
BTW this shadertoy is a shrunken & reinterpreted version of a larger, more feature rich shadertoy by iq: Clouds
Before diving into the details of the code, here is how it works in short:
- Every pixel does a ray march from far to near. It does it backwards to make for simpler alpha blending math.
- At every ray step, it samples FBM data (fractal brownian motion) to figure out if the current position is below the surface of the cloud or above it.
- If below, it alpha blends the pixel color with the cloud color at that point, using the vertical distance into the cloud as the cloud density.
Pretty reasonable and simple – and it would have to be, to look so good in so few characters! Let’s dig into the code.
#define T texture(iChannel0,(s*p.zw+ceil(s*p.x))/2e2).y/(s+=s)*4.
void mainImage(out vec4 O,vec2 x){
    vec4 p,d=vec4(.8,0,x/iResolution.y-.8),c=vec4(.6,.7,d);
    O=c-d.w;
    for(float f,s,t=2e2+sin(dot(x,x));--t>0.;p=.05*t*d)
        p.xz+=iTime,
        s=2.,
        f=p.w+1.-T-T-T-T,
    	f<0.?O+=(O-1.-f*c.zyxw)*f*.4:O;
}
Line 1 is a define that we’ll come back to and line 2 is just a minimal definition of the mainImage function.
#define T texture(iChannel0,(s*p.zw+ceil(s*p.x))/2e2).y/(s+=s)*4.
void mainImage(out vec4 O,vec2 x){
    vec4 p,d=vec4(.8,0,x/iResolution.y-.8),c=vec4(.6,.7,d);
    O=c-d.w;
    for(float f,s,t=2e2+sin(dot(x,x));--t>0.;p=.05*t*d)
        p.xz+=iTime,
        s=2.,
        f=p.w+1.-T-T-T-T,
    	f<0.?O+=(O-1.-f*c.zyxw)*f*.4:O;
}
On line 3 several variables are declared:
- p – this is the variable that holds the position of the ray during the ray march. It isn’t initialized here, but that’s ok because the position is calculated each step in the loop. It is interesting to see that the y component of p is never used. p.x is actually depth into the screen, p.z is the screen x axis, and p.w is the screen y axis (aka the up axis). I believe that the axis choices and the fact that the y component is never used is purely to make the code smaller.
- d – this is the direction that the ray for this pixel travels in. It uses the same axis conventions as p, and the y component is also never used (except implicitly for calculating p.y, which is never used). 0.8 is subtracted from d.z and d.w (the screen x and screen y axes). Interestingly that makes the screen x axis 0 nearly centered on the screen. It also points the screen y axis downward a bit, putting the 0 value near the top of the screen to make the camera look more downward at the clouds.
- c – this is the color of the sky, which is a nice sky blue. It’s initialized with constants in x and y, and then d is used for z and w. d.xy goes into c.zw. That gives c the 0.8 value in the z field. I’m sure it was done this way because it’s fewer characters to initialize using “d” compared to “.8,0.” for the same effect. Note that c.w is used to calculate O.w (O.a) but that the alpha channel of the output pixel value is currently ignored by shadertoy, so this is a meaningless by product of the code, not a desired feature.
#define T texture(iChannel0,(s*p.zw+ceil(s*p.x))/2e2).y/(s+=s)*4.
void mainImage(out vec4 O,vec2 x){
    vec4 p,d=vec4(.8,0,x/iResolution.y-.8),c=vec4(.6,.7,d);
    O=c-d.w;
    for(float f,s,t=2e2+sin(dot(x,x));--t>0.;p=.05*t*d)
        p.xz+=iTime,
        s=2.,
        f=p.w+1.-T-T-T-T,
    	f<0.?O+=(O-1.-f*c.zyxw)*f*.4:O;
}
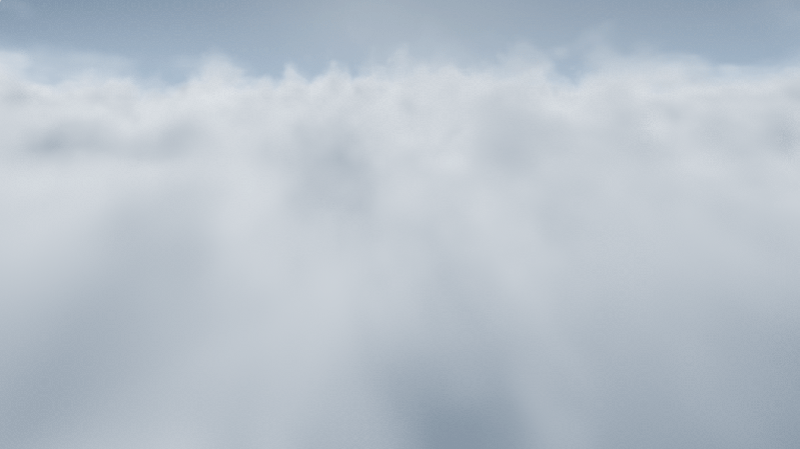
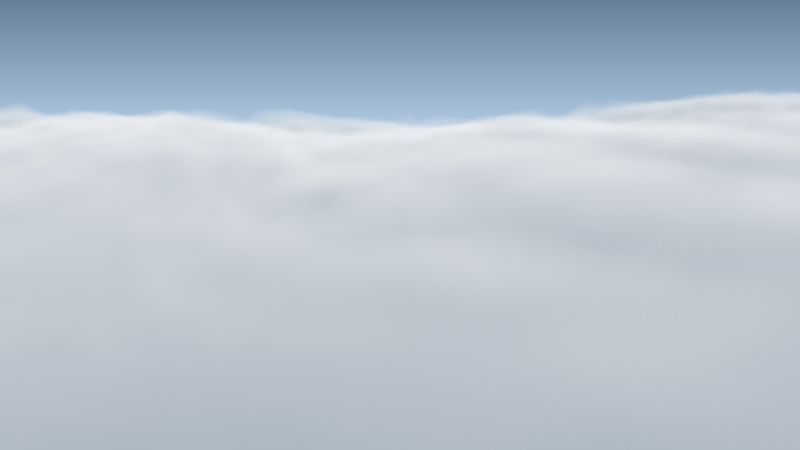
Line 4 initializes the output pixel color to be the sky color (c), but then subtracts d.w which is the pixel’s ray march direction on the screen y axis. This has a nice effect of making a nice sky blue gradient.
To see this in action, here we set O to c:

Here we set O to c-d.w:

It gets darker blue towards the top – where d.w is positive – because a positive number is being subtracted from the sky color. The color values get smaller.
It gets lighter towards the bottom – where d.w is negative – because a negative number is being subtracted from the sky color. The color values get larger.
#define T texture(iChannel0,(s*p.zw+ceil(s*p.x))/2e2).y/(s+=s)*4.
void mainImage(out vec4 O,vec2 x){
    vec4 p,d=vec4(.8,0,x/iResolution.y-.8),c=vec4(.6,.7,d);
    O=c-d.w;
    for(float f,s,t=2e2+sin(dot(x,x));--t>0.;p=.05*t*d)
        p.xz+=iTime,
        s=2.,
        f=p.w+1.-T-T-T-T,
    	f<0.?O+=(O-1.-f*c.zyxw)*f*.4:O;
}
On line 5, the for loop for ray marching starts. A few things happen here:
- f is declared – f is the signed vertical distance from the current point in space to the cloud. If negative, it means that the point is inside the cloud. If positive, it means that the point is outside (above) the cloud. It isn’t initialized here, but it’s calculated each iteration of the loop so that’s fine.
- s is declared – s is a scale value for use with the FBM data. FBMs work by sampling multiple octaves of data. You scale up the position and scale down the value for each octave. s is that scale value, used for both purposes. This isn’t initialized but is calculated each frame so that’s fine.
- t is declared and initialized – t (aka ray march step index) is initialized to 2e2 aka 200. It was done this way because “2e2” is smaller than “200.” by one character. Note that the for loop takes t from 200 to 0. The ray marching happens back to front to simplify alpha blending. The sin(dot(x,x)) part I want to talk about briefly below.
- p is calculated – p (aka the position in the current step of the ray march) is calculated, and this happens every step of the loop. p is t (time) multiplied by the direction of the ray for this pixel, and multiplied by .05 to scale it down.
The reason that sin(dot(x,x)) is added to the “ray time” is because the ray is marching through voxelized data (boxes). Unlike boxes, clouds are supposed to look organic, and not geometric. A way to fight the problem of the data looking boxy is to add a little noise to each ray to break up the geometric pattern. You can either literally add some noise to the result, or do what this shader does, which is add some noise to the starting position of the ray so that neighboring rays will cross the box (voxel) boundaries at different times and will look noisy instead of geometric.
I can’t see a difference when removing this from the shader, and other people have said the same. Rune says in the comments that it’d be on the chopping block for sure if he needed to shave off some more characters. He reached his 280 character goal, so no there is no need to remove it.
For what it’s worth, here is that expression visualized in the blue channel. the -1 to +1 is mapped to 0 to 1 by multiplying it by a half and adding a half:

#define T texture(iChannel0,(s*p.zw+ceil(s*p.x))/2e2).y/(s+=s)*4.
void mainImage(out vec4 O,vec2 x){
    vec4 p,d=vec4(.8,0,x/iResolution.y-.8),c=vec4(.6,.7,d);
    O=c-d.w;
    for(float f,s,t=2e2+sin(dot(x,x));--t>0.;p=.05*t*d)
        p.xz+=iTime,
        s=2.,
        f=p.w+1.-T-T-T-T,
    	f<0.?O+=(O-1.-f*c.zyxw)*f*.4:O;
}
Line 6 adds the current time to p.x and p.z. Remember that the x component is the axis pointing into the screen and the z component is the screen space x axis, so this line of code moves the camera forward and to the right over time.
If you are wondering why the lines in the for loop end in a comma instead of a semicolon, the reason is because if a semicolon was used instead, the for loop would require two more characters: “{” and “}” to show where the scope of the loop started and ended. Ending the lines with commas mean it’s one long statement, so the single line version of a for loop can be used. An interesting trick 😛
#define T texture(iChannel0,(s*p.zw+ceil(s*p.x))/2e2).y/(s+=s)*4.
void mainImage(out vec4 O,vec2 x){
    vec4 p,d=vec4(.8,0,x/iResolution.y-.8),c=vec4(.6,.7,d);
    O=c-d.w;
    for(float f,s,t=2e2+sin(dot(x,x));--t>0.;p=.05*t*d)
        p.xz+=iTime,
        s=2.,
        f=p.w+1.-T-T-T-T,
    	f<0.?O+=(O-1.-f*c.zyxw)*f*.4:O;
}
Line 7 sets / initializes s to 2. Remember that s is used as the octave scale for sample position and resulting value. That will come into play in the next line.
#define T texture(iChannel0,(s*p.zw+ceil(s*p.x))/2e2).y/(s+=s)*4.
void mainImage(out vec4 O,vec2 x){
    vec4 p,d=vec4(.8,0,x/iResolution.y-.8),c=vec4(.6,.7,d);
    O=c-d.w;
    for(float f,s,t=2e2+sin(dot(x,x));--t>0.;p=.05*t*d)
        p.xz+=iTime,
        s=2.,
        f=p.w+1.-T-T-T-T,
    	f<0.?O+=(O-1.-f*c.zyxw)*f*.4:O;
}
First let’s look at line 1, which is the “T” macro.
That macro samples the texture (which is just white noise) at a position described by the current ray position in the ray march. the s variable is used to scale up the position, and it’s also used to scale down the noise value at that position. The same position involves p.zw which is the screen space x and y axis respectively, but also includes p.x which is the axis pointing into the screen. This maps a 3d coordinate to a 2d texture location. I have tried making the shader sample a 3d white noise texture instead of doing this and get what looks to be the same quality results.
The macro also multiplies s by 2 each sample, so that the next sample will sample the next octave.
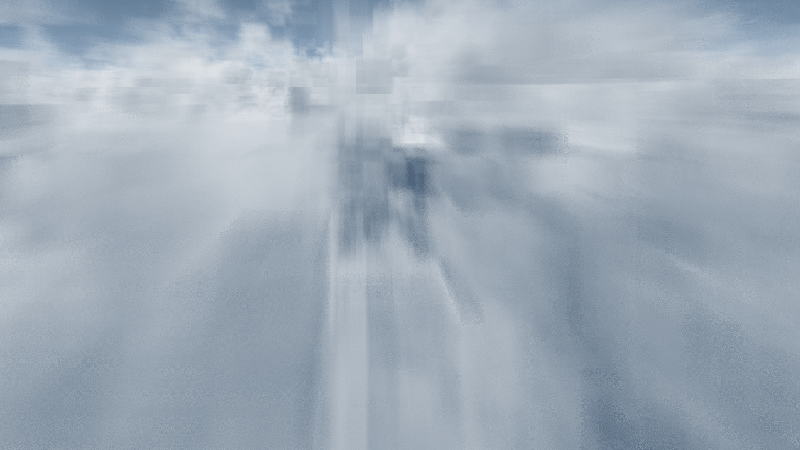
An interesting part of this texture coordinate conversion from 3d to 2d though is that the x component is ceil’d(the axis that goes into the screen). I’m not sure if there is any logic to this other than it’s a way to transform the 3d coordinates into a 2d one for the texture lookup.
Below is what it looks like without the ceil in the macro for s*p.x. It stretches the noise in a weird way.

The uv coordinates sampled are divided by 2e2 (which is 200, but again, fewer characters than “200.”). I believe this value of 200 matches the number of ray march steps intentionally, so that the ray marches across the entire texture (with wrap around) each time.
Line 8 uses this macro. We set f to be p.w, which is the ray’s height. 1 is added to the height which moves the camera up one unit. Lastly, the T macro is used to subtract 4 octaves of noise from f.
The result of this is that f gives us a signed distance to the cloud on the vertical axis. In other words, f tells us how far above or below the surface of the clouds we are. A positive value means the position is above the clouds, and a negative value means the position is below the clouds.
#define T texture(iChannel0,(s*p.zw+ceil(s*p.x))/2e2).y/(s+=s)*4.
void mainImage(out vec4 O,vec2 x){
    vec4 p,d=vec4(.8,0,x/iResolution.y-.8),c=vec4(.6,.7,d);
    O=c-d.w;
    for(float f,s,t=2e2+sin(dot(x,x));--t>0.;p=.05*t*d)
        p.xz+=iTime,
        s=2.,
        f=p.w+1.-T-T-T-T,
    	f<0.?O+=(O-1.-f*c.zyxw)*f*.4:O;
}
Line 10 is the close of the function, so line 9 is the last meaningful line of code.
This line of code says:
- If f less than zero (“If the point is inside the cloud”)
- Then add “some formula” to the pixel color (more info on that in a moment)
- Else, “O”. This is a dummy statement with no side effects that is there to satisfy the ternary operator syntax with a minimal number of characters.
I was looking at that formula for a while, trying to figure it out. I was thinking maybe it was something like a cheaper function fitting of some more complex light scattering / absorption function.
I asked Rune and he explained it. All it’s doing is doing an alpha blend (a lerp) from the current pixel color to the color of the cloud at this position. If you do the lerp mathematically, expand the function and combine terms, you get the above. Here’s his explanation from twitter (link to twitter thread):
Alpha blending between accumulated color (O) and incoming cloud color (1+f*c.zyxw). Note density (f) is negative:
O = lerp(O, 1+f*c.zyxw, -f*.4)
O = O * (1+f*.4) + (1+f*c.zyxw)*-f*.4
O = O + O*f*.4 + (1+f*c.zyxw)*-f*.4
O = O + (O-1-f*c.zyxw)*f*.4
O += (O-1-f*c.zyxw)*f*.4
Remember the marching is from far to near which simplifies the calculations quite a bit. If the marching was reversed then you would also need to keep track of an accumulated density.
One obvious question then would be: why is “1+f*c.zyxw” the cloud color of the current sample?
One thing that helps clear that up is that f is negative. if you make “f” mean “density” and flip it’s sign, the equation becomes: “1-density*c.zyxw”
We can then realize that “1” when interpreted as a vec4 is the color white, and that c is the sky color. We can also throw out the w since we (and shadertoy) don’t care about the alpha channel. We can also replace x,y,z with r,g,b. That makes the equation become: “white-density*skycolor.bgr”
In that equation, when density is 0, all we are left with is white. As density increases, the color gets darker.
The colors are the reversed sky color, because the sky color is (0.6, 0.7, 0.8). if we used the sky color instead of the reversed sky color, you can see that blue would drop away faster than green, which would drop away faster than red. If you do that, the clouds turn a reddish color like you can see here:
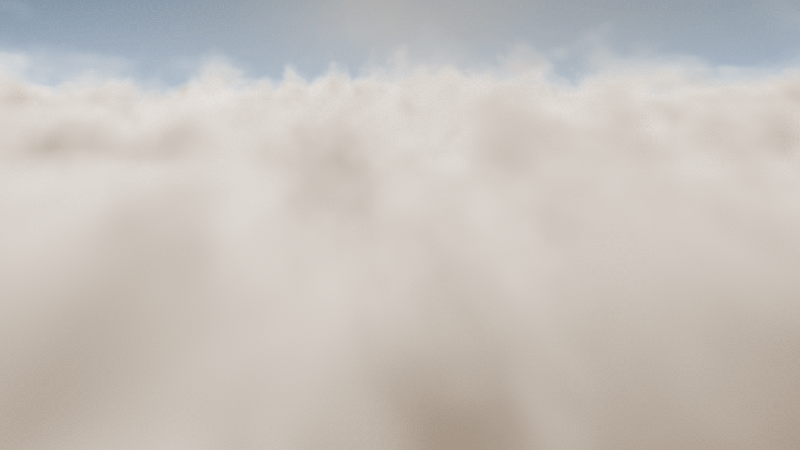
I’m not an expert in atmospheric rendering (check links at the bottom for more info on that!), but it looks more natural and correct for it to do the reverse. What we really want is for red to drop off the quickest, then green, then blue. I believe a more correct thing to do would be to subtract sky color from 1.0 and use that color to multiply density by. However, reversing the color channels works fine in this case, so no need to spend the extra characters!
Another obvious question might be: why is the amount of lerp “-f*.4”?
It probably looks strange to see a negative value in a lerp amount, but remembering that f is negative when it’s inside a cloud means that it’s a positive value, multiplied by 0.4 to make it smaller. It’s just scaling the density a bit.
Other Notes
Using bilinear interpolation of the texture makes a big difference. If you switch the texture to using nearest neighbor point sampling you get something like this which looks very boxy. It looks even more boxy when it’s in motion.
One thing I wanted to try when understanding this shader was to try to replace the white noise texture lookup with a white noise function. It does indeed work as you can see below, but it got noticeably slower on my machine doing that. I’m so used to things being texture bound that getting rid of texture reads is usually a win. I didn’t stop to think that in this situation all that was happening was compute and no texture reads. In a more fully featured renderer, you may indeed find yourself texture read bound, and moving it out of a texture read could help speed things up – profile and see! It’s worth noting that to get proper results you need to discretize your noise function into a grid and use bilinear interpolation between the values – mimicing what the texture read does. Check my unpacked version of the shader in the links section for more details!
Something kind of fun is that you can replace the white noise texture with other textures. The results seem to be pretty good usually! Below is where i made the shadertoy use the “Abstract1” image as a source. The clouds got a lot more soft.
Thanks for reading. Anything that I got wrong or missed, please let me and the other readers know!
Links
Here is my unpacked version of the shader, which includes the option to use a white noise function instead of a white noise texture: Tiny Clouds: Unpacked & No Tex
Here are two great links for more information on how to render atmospheric and volumetric effects:

Nice blog you havee
LikeLike
thanks! 🙂
LikeLike